During one of the many English heatwaves this year, the group decided to try lino lithography. We followed the instructions from Scarlett Rebecca’s new book Alternative Lithography. While I was experimenting with lino lithography in the workshop, at home I have been working with polyester plate lithography. Both techniques offer printmakers an alternative to lithography that they can do without stones, metal plates and with limited supplies.
Lino Lithography
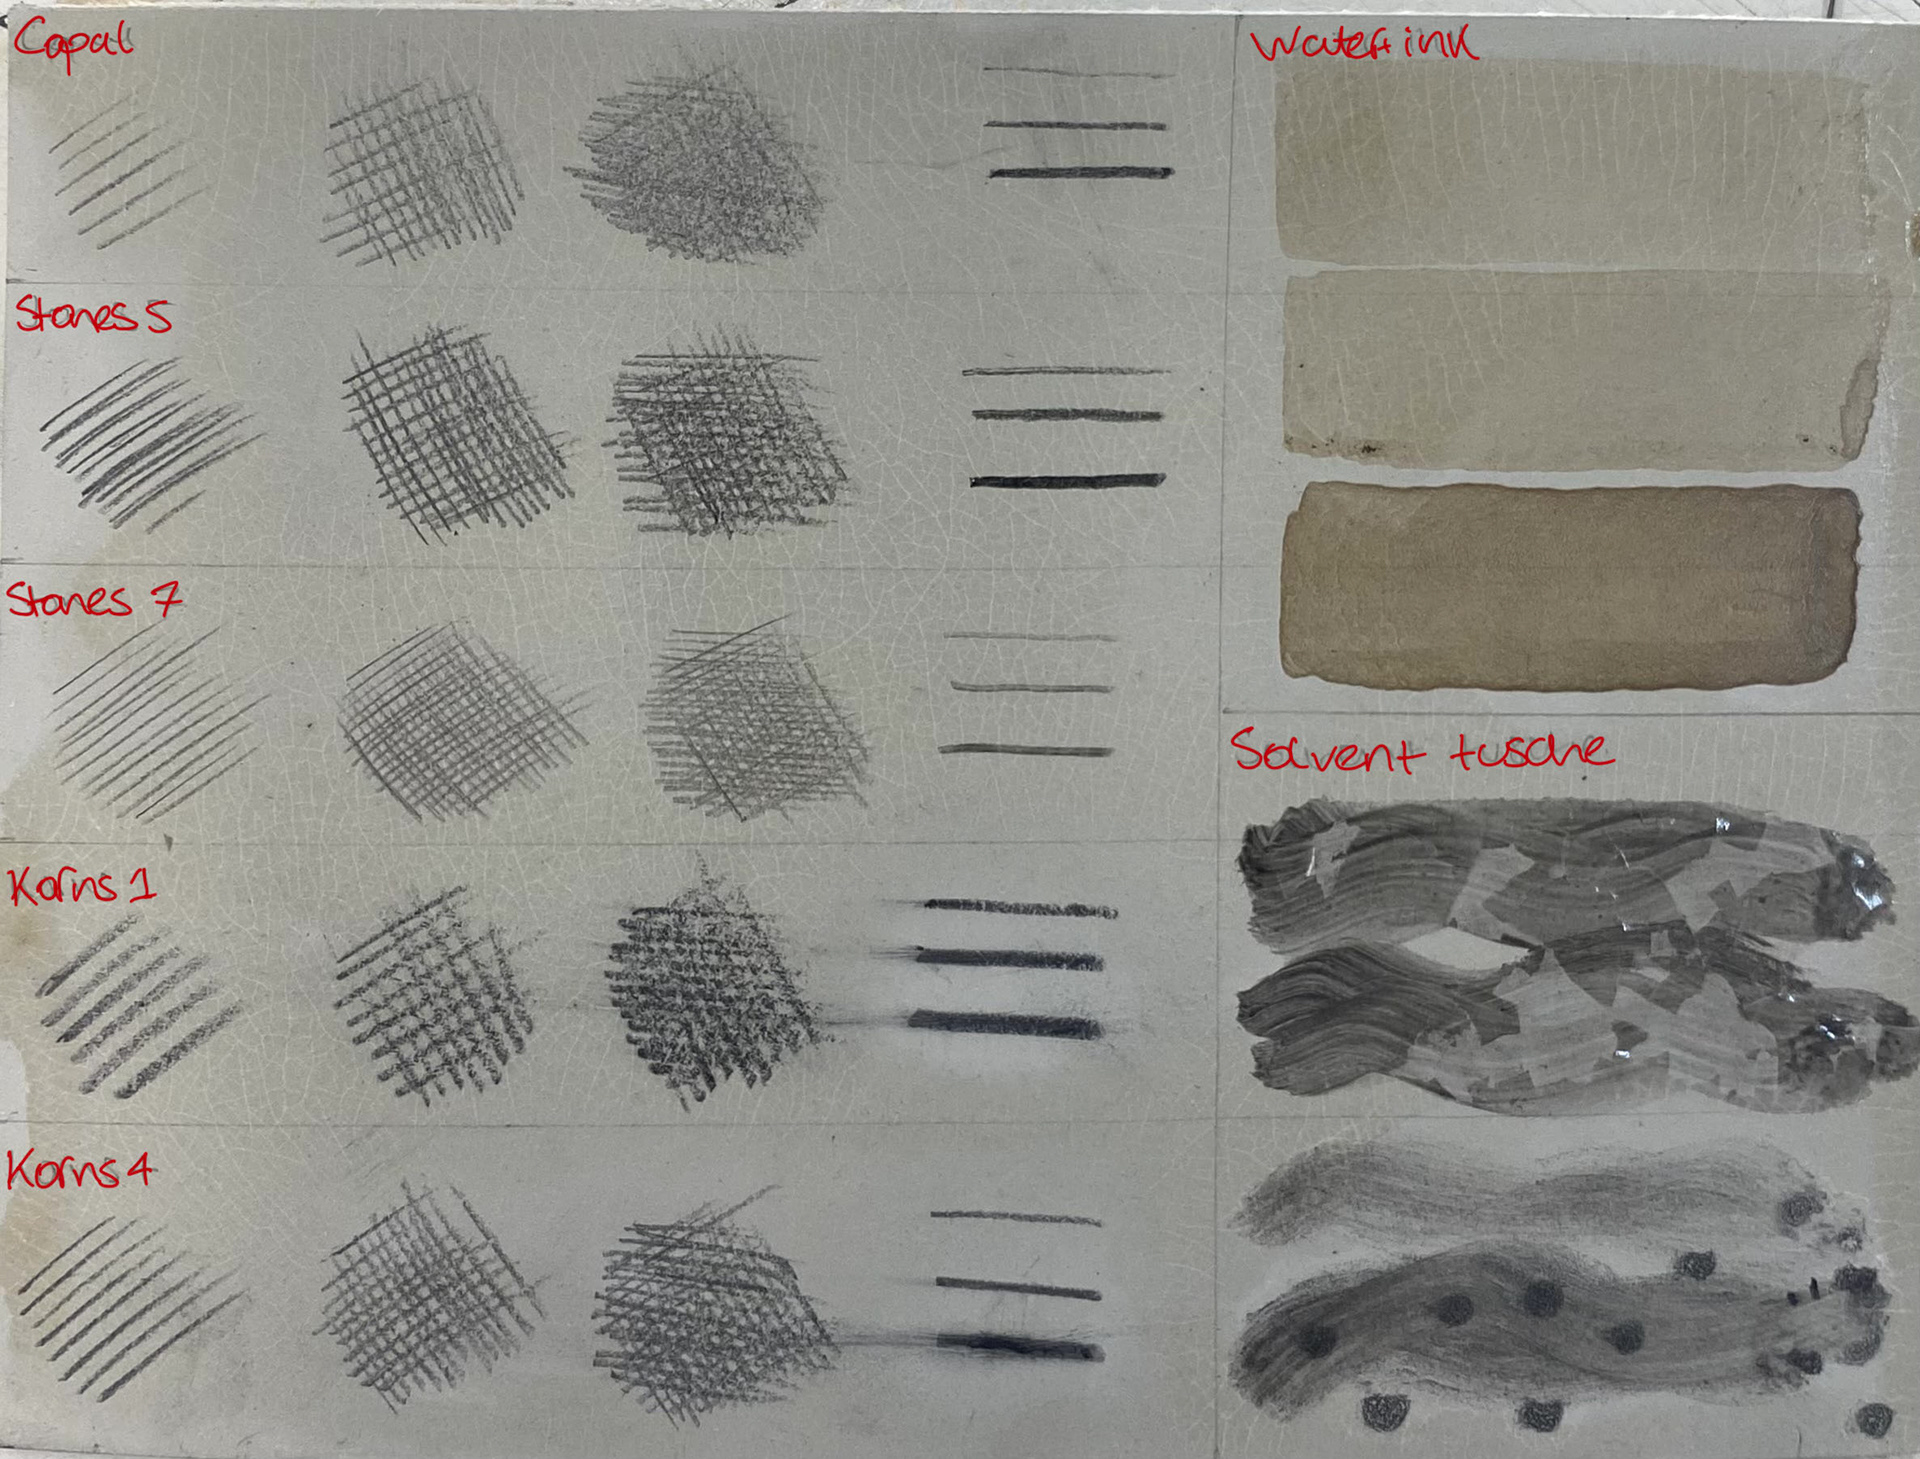
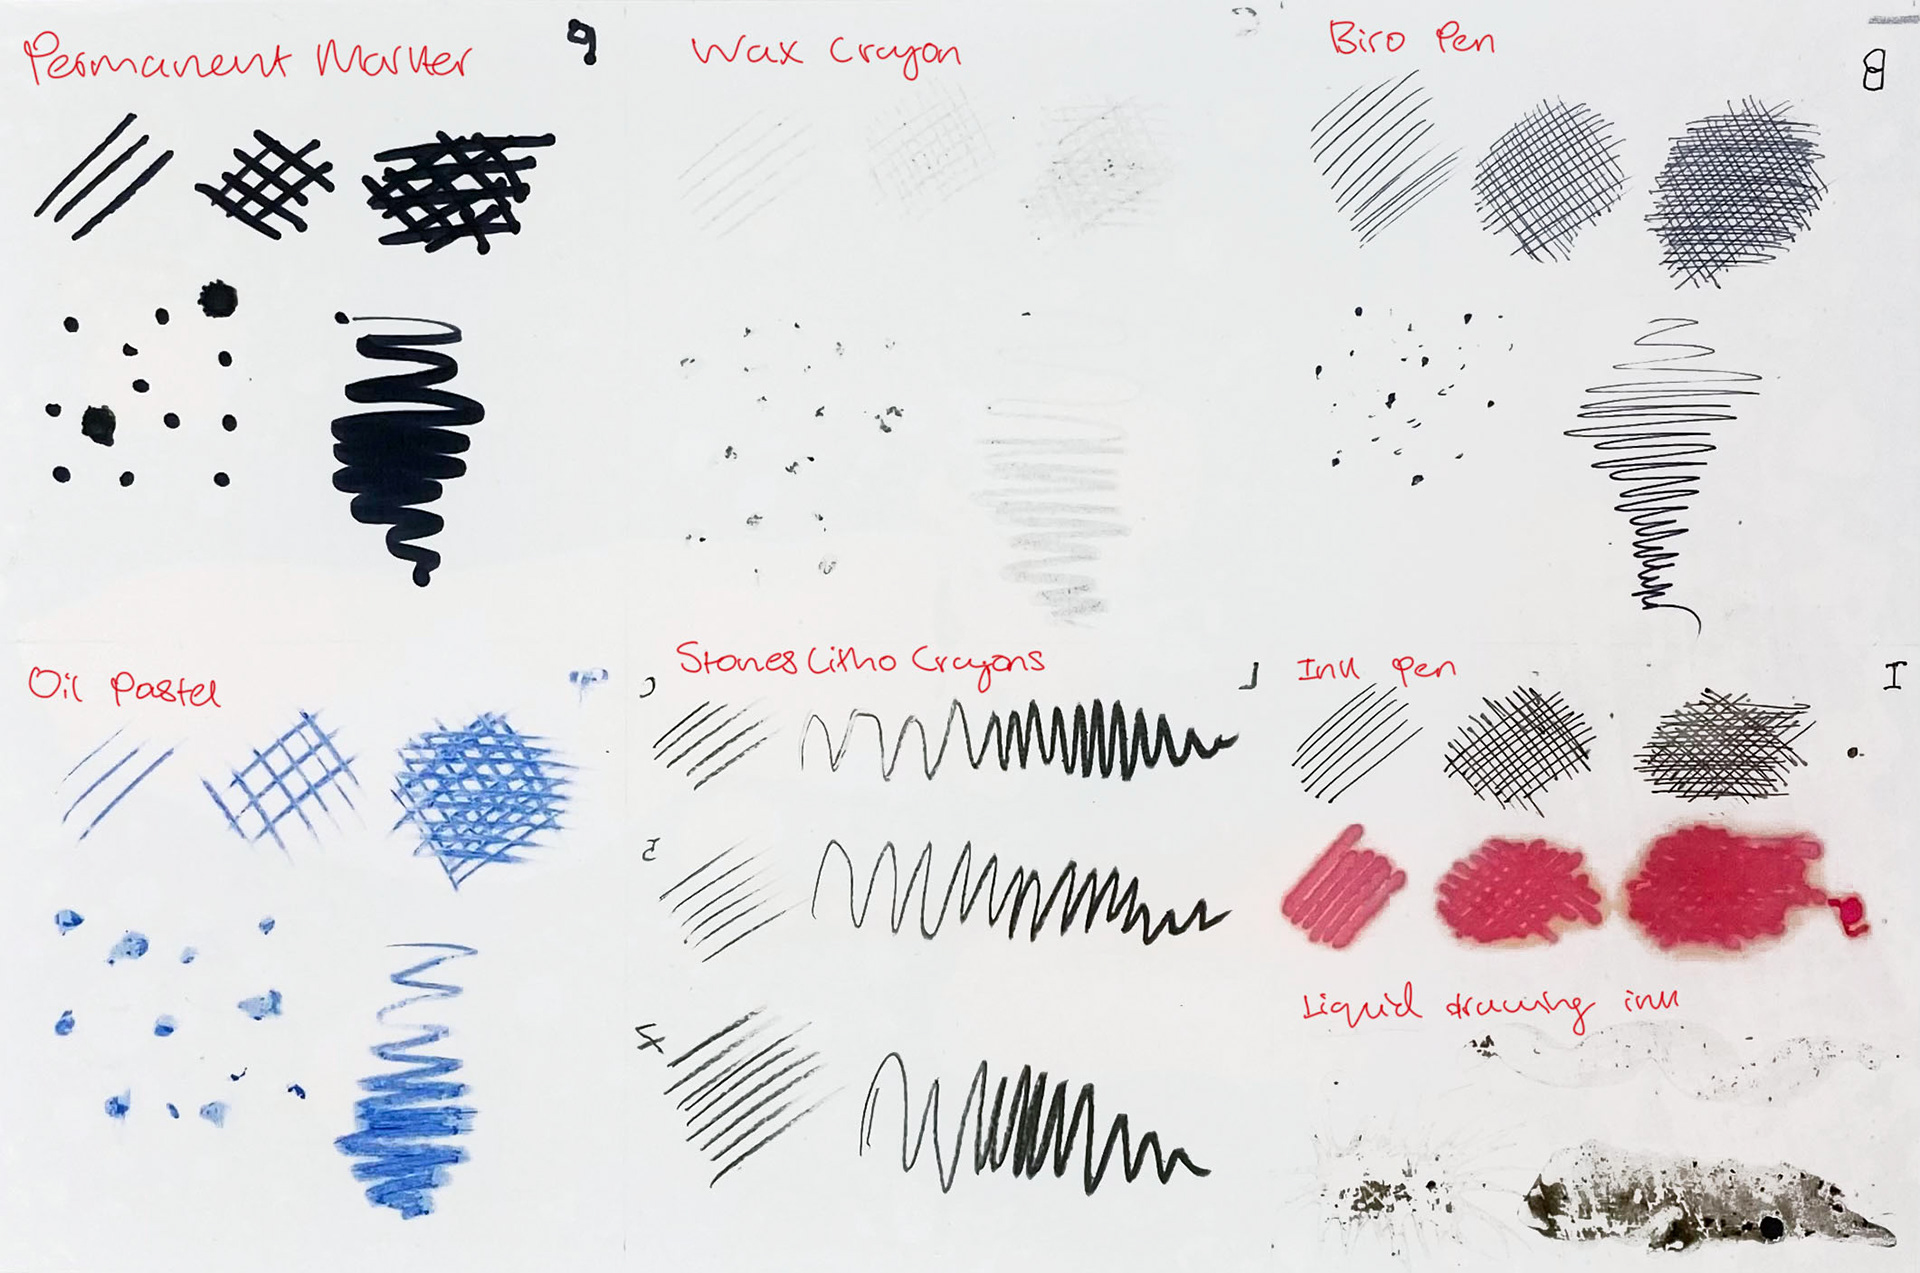
To begin, we sanded down an A5 piece of lino that would act as our test plate. This is to get rid of the water-resistant surface. The plate is then able to be drawn on immediately with the usual lithography materials. On my plate I tested a range of drawing materials to see how each would print. This is then covered with gum and left to rest at least for 24 hours.
To print, I first used a loose ink and foam roller but after realising how quickly the plate rolled up and how dark the prints would get, I switched to a stiff ink and rubber roller.
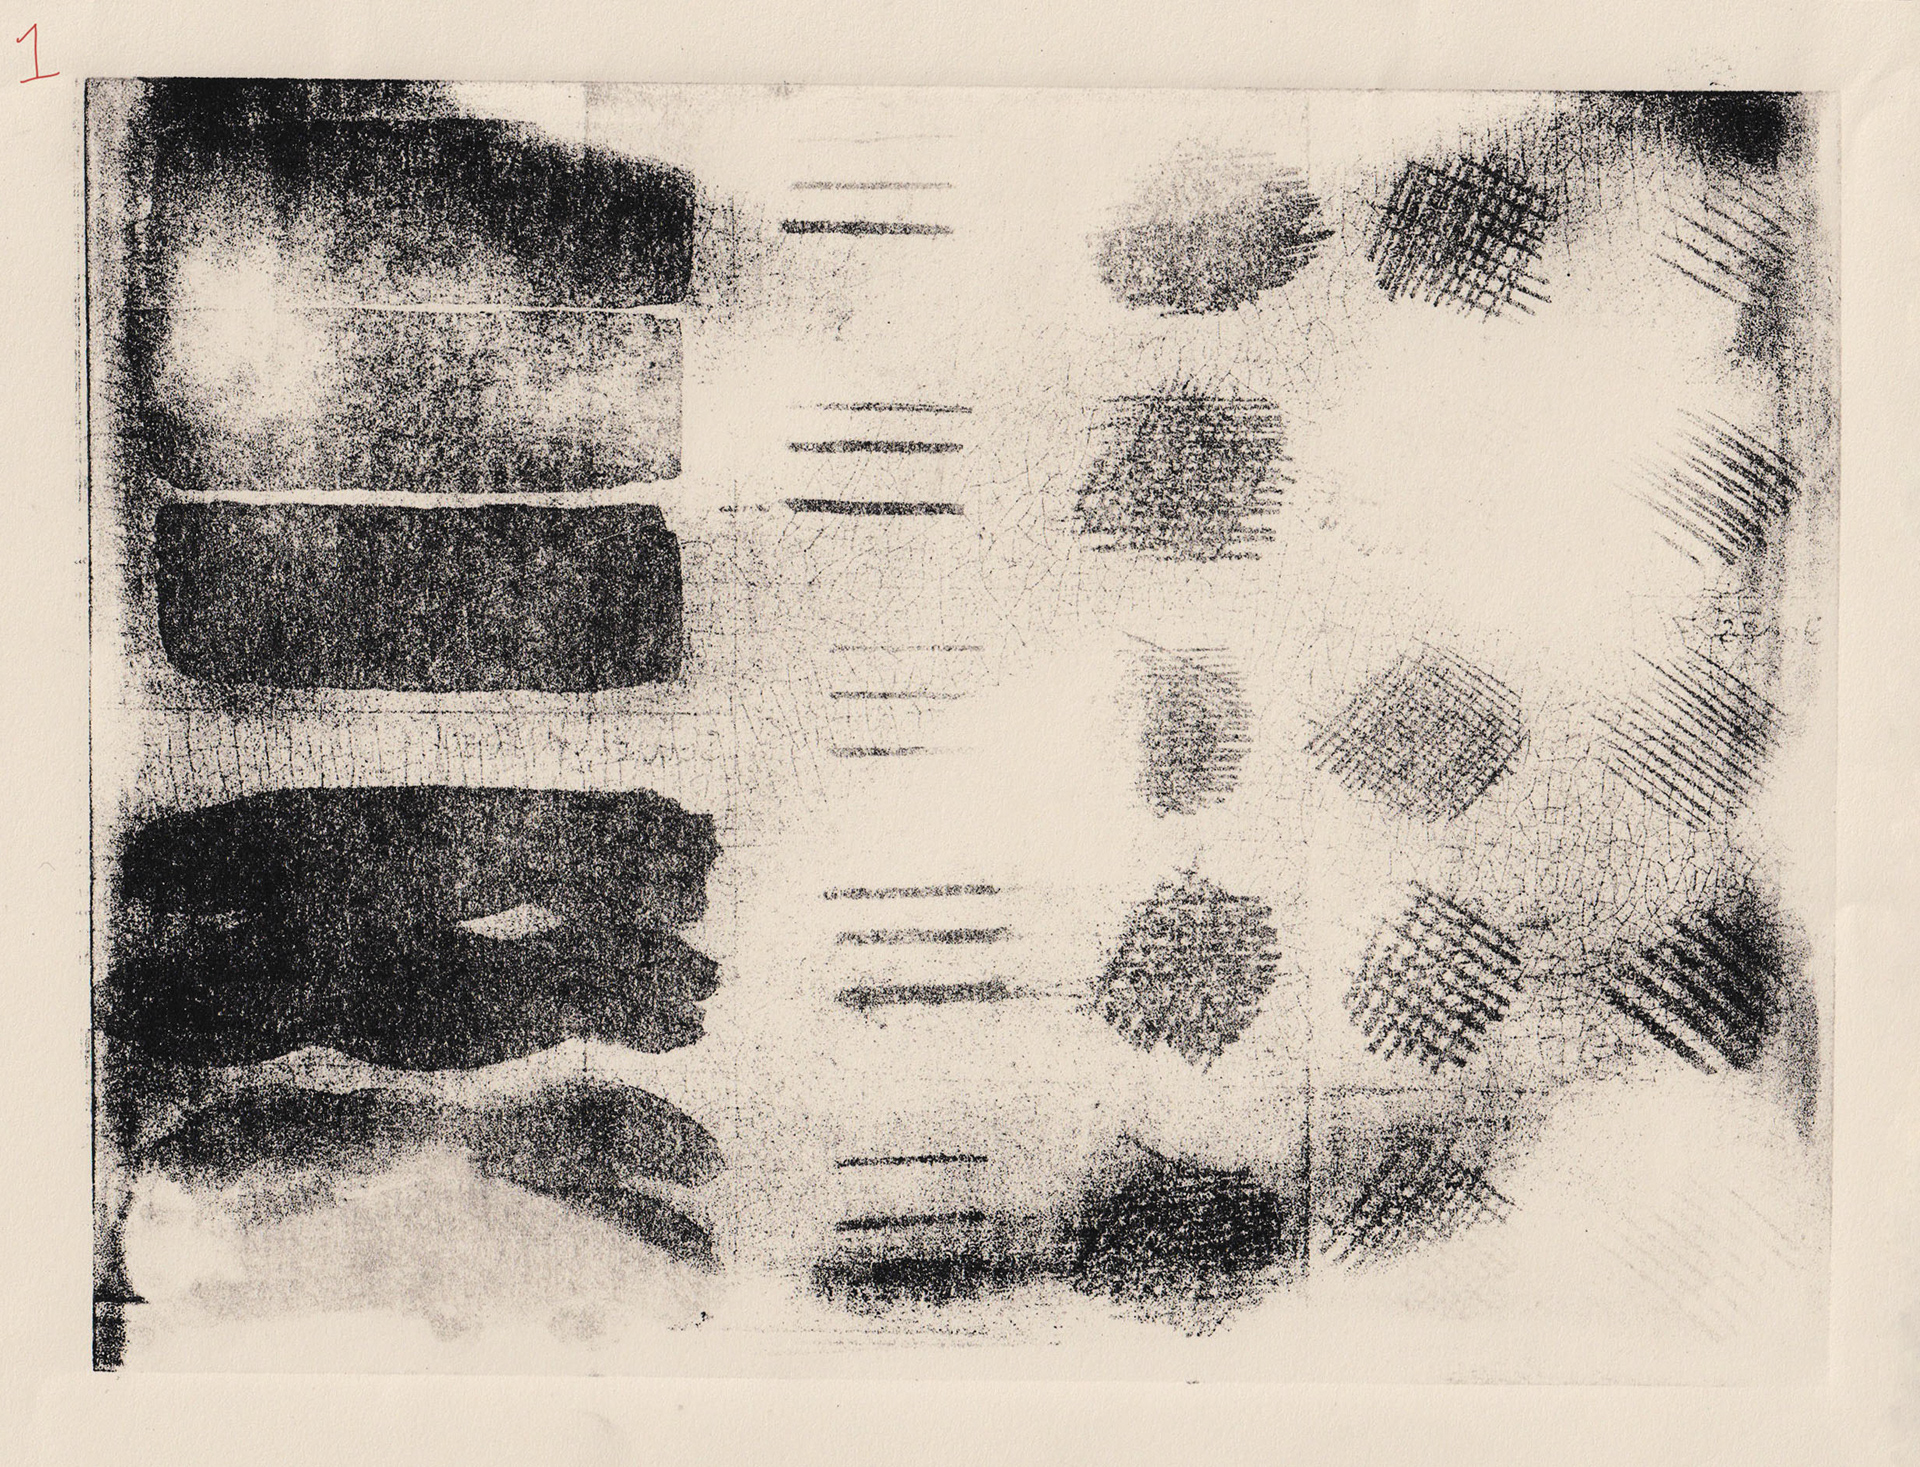
Here are some things I noted after my first try at printing:
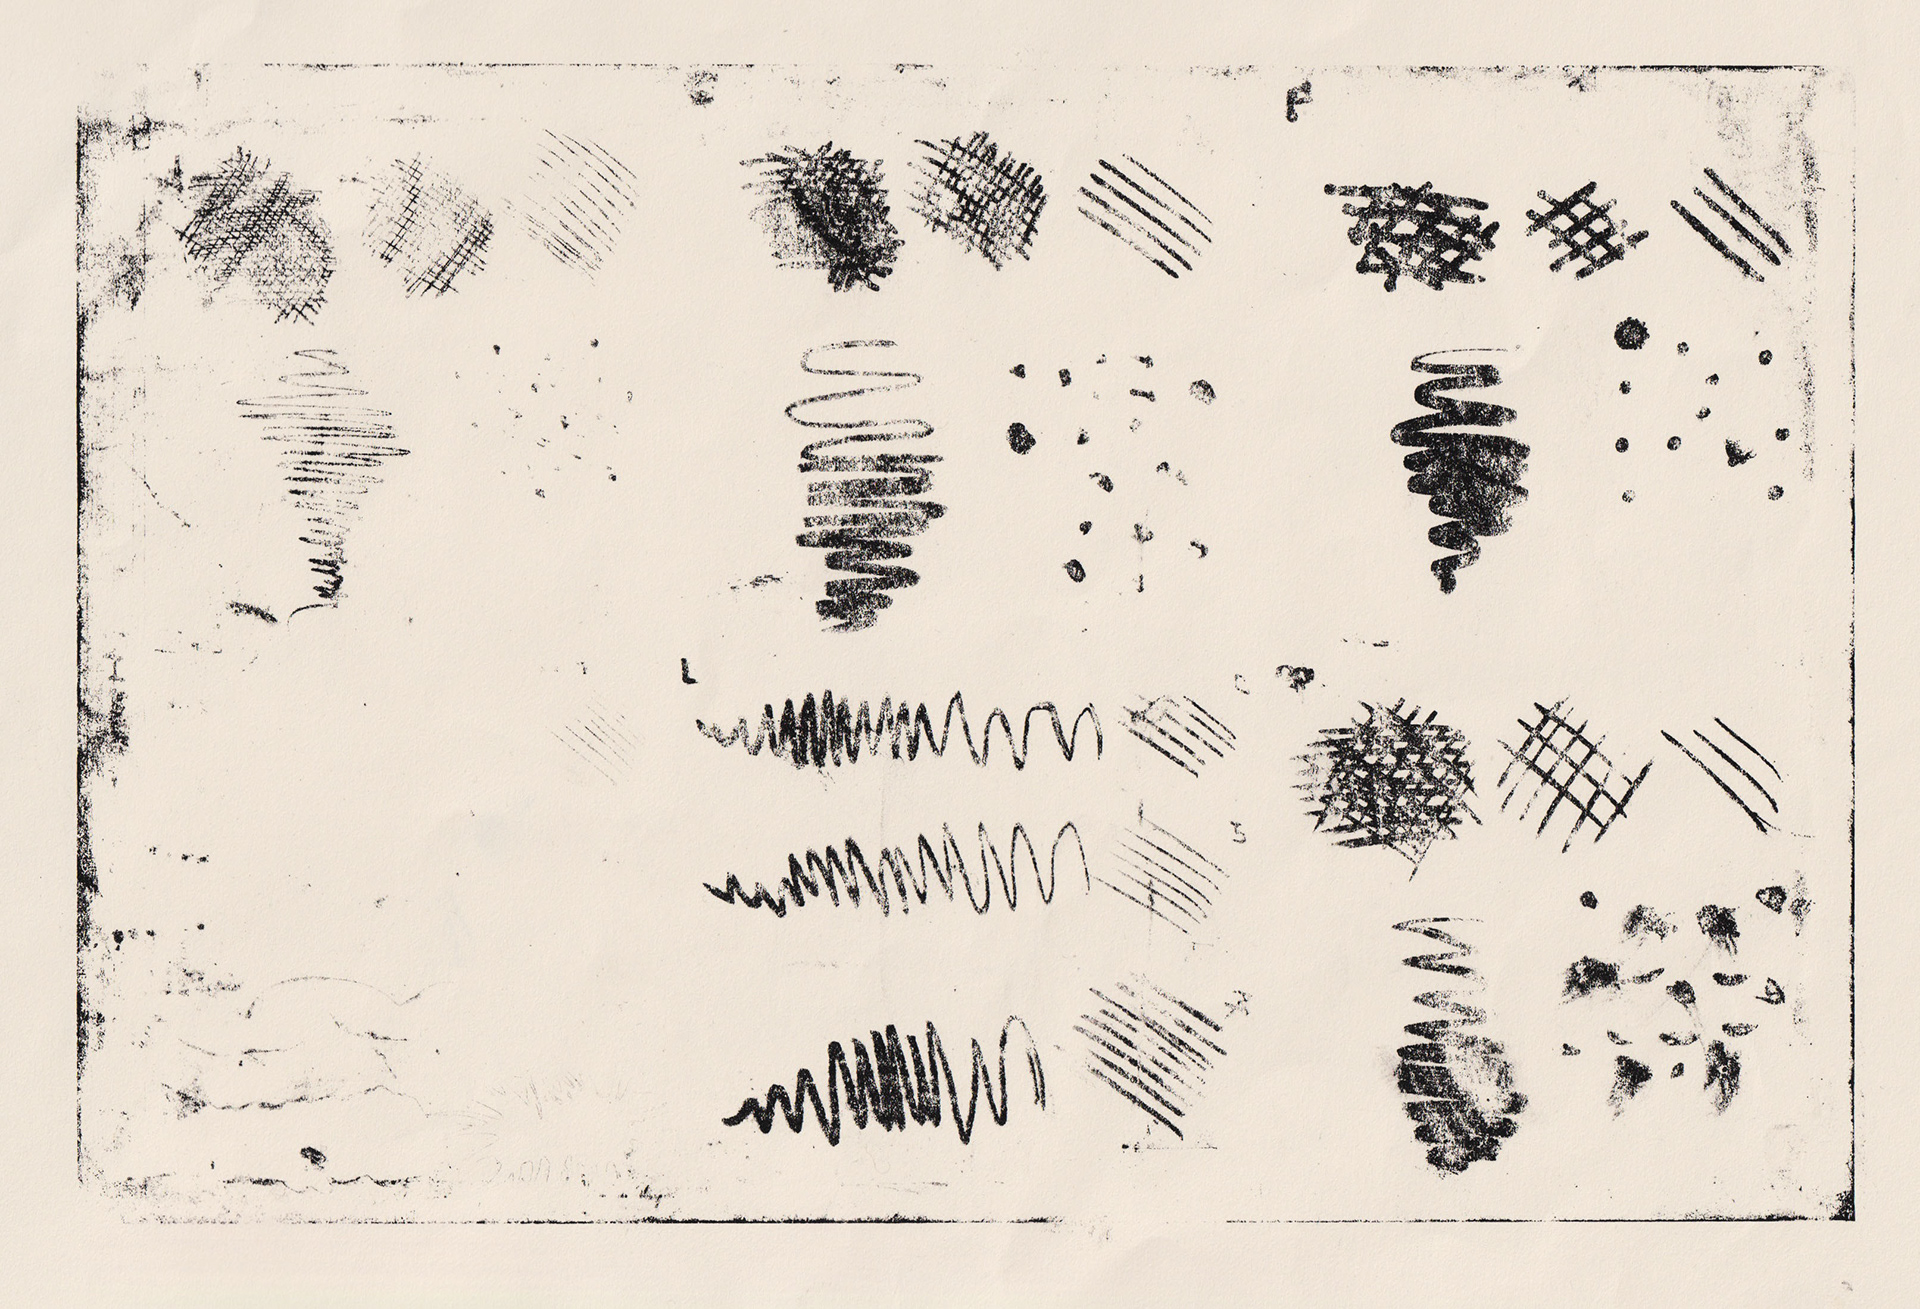
-The washes that were on the plate did not print with much variation in tone or detail.
-The hard crayons printed surprisingly sharp
-A cracked pattern formed in the background from when we had the gum drying on the plate out in the sun
-The background slowly filled in on the edges
-Some areas didn’t print
Now the problems that I came across with inking and filling in can be troubleshooted as Scarlett outlines in her book though after my first run at printing the lino litho I decided to do a bit of experimenting.
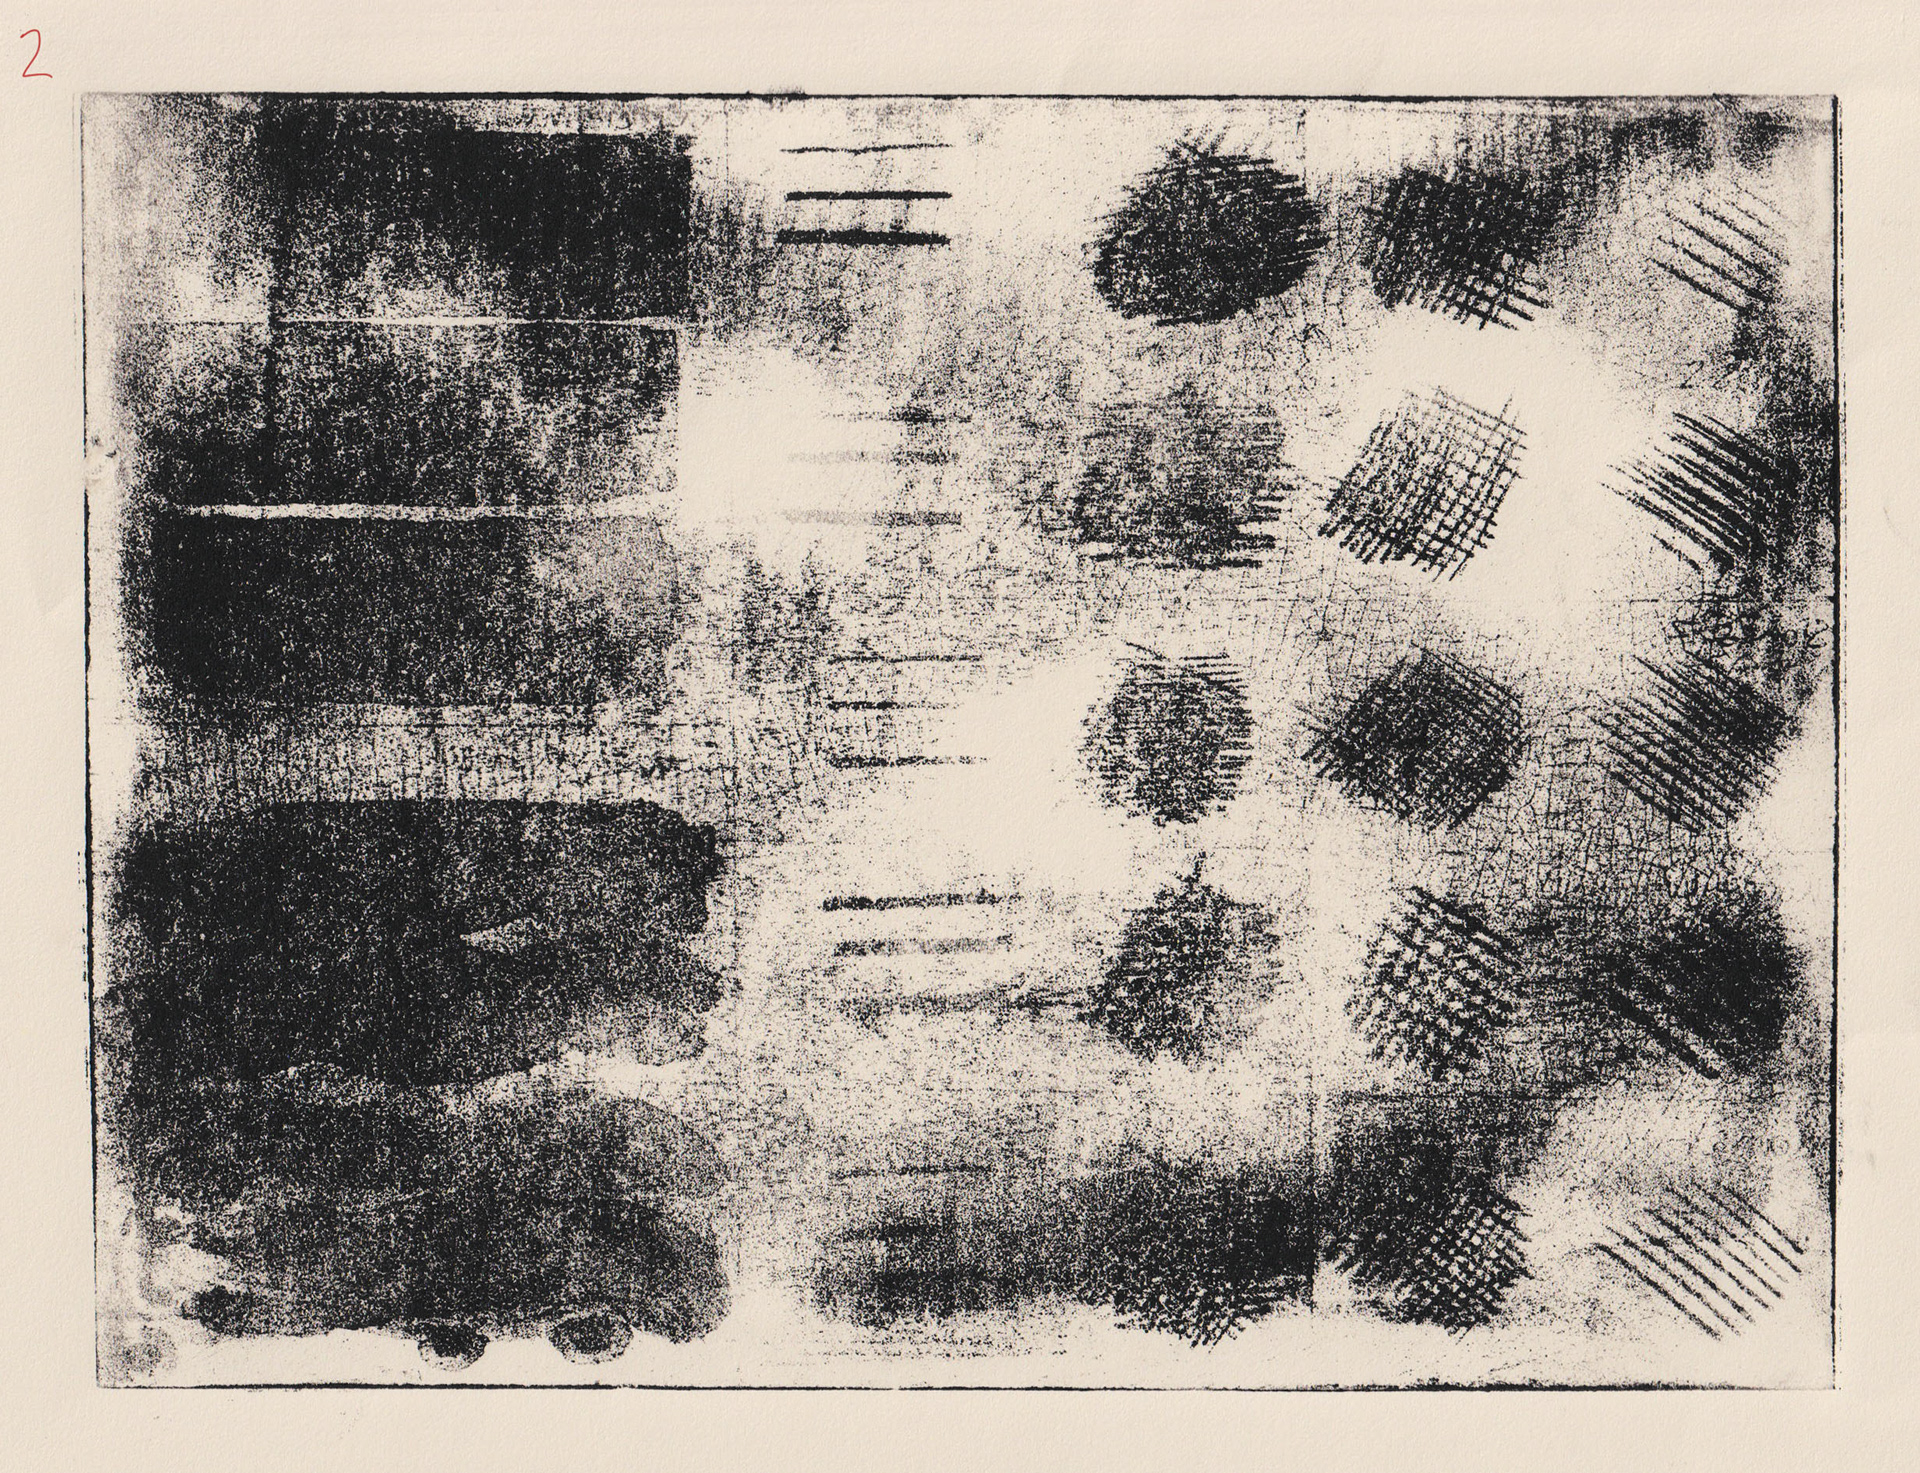
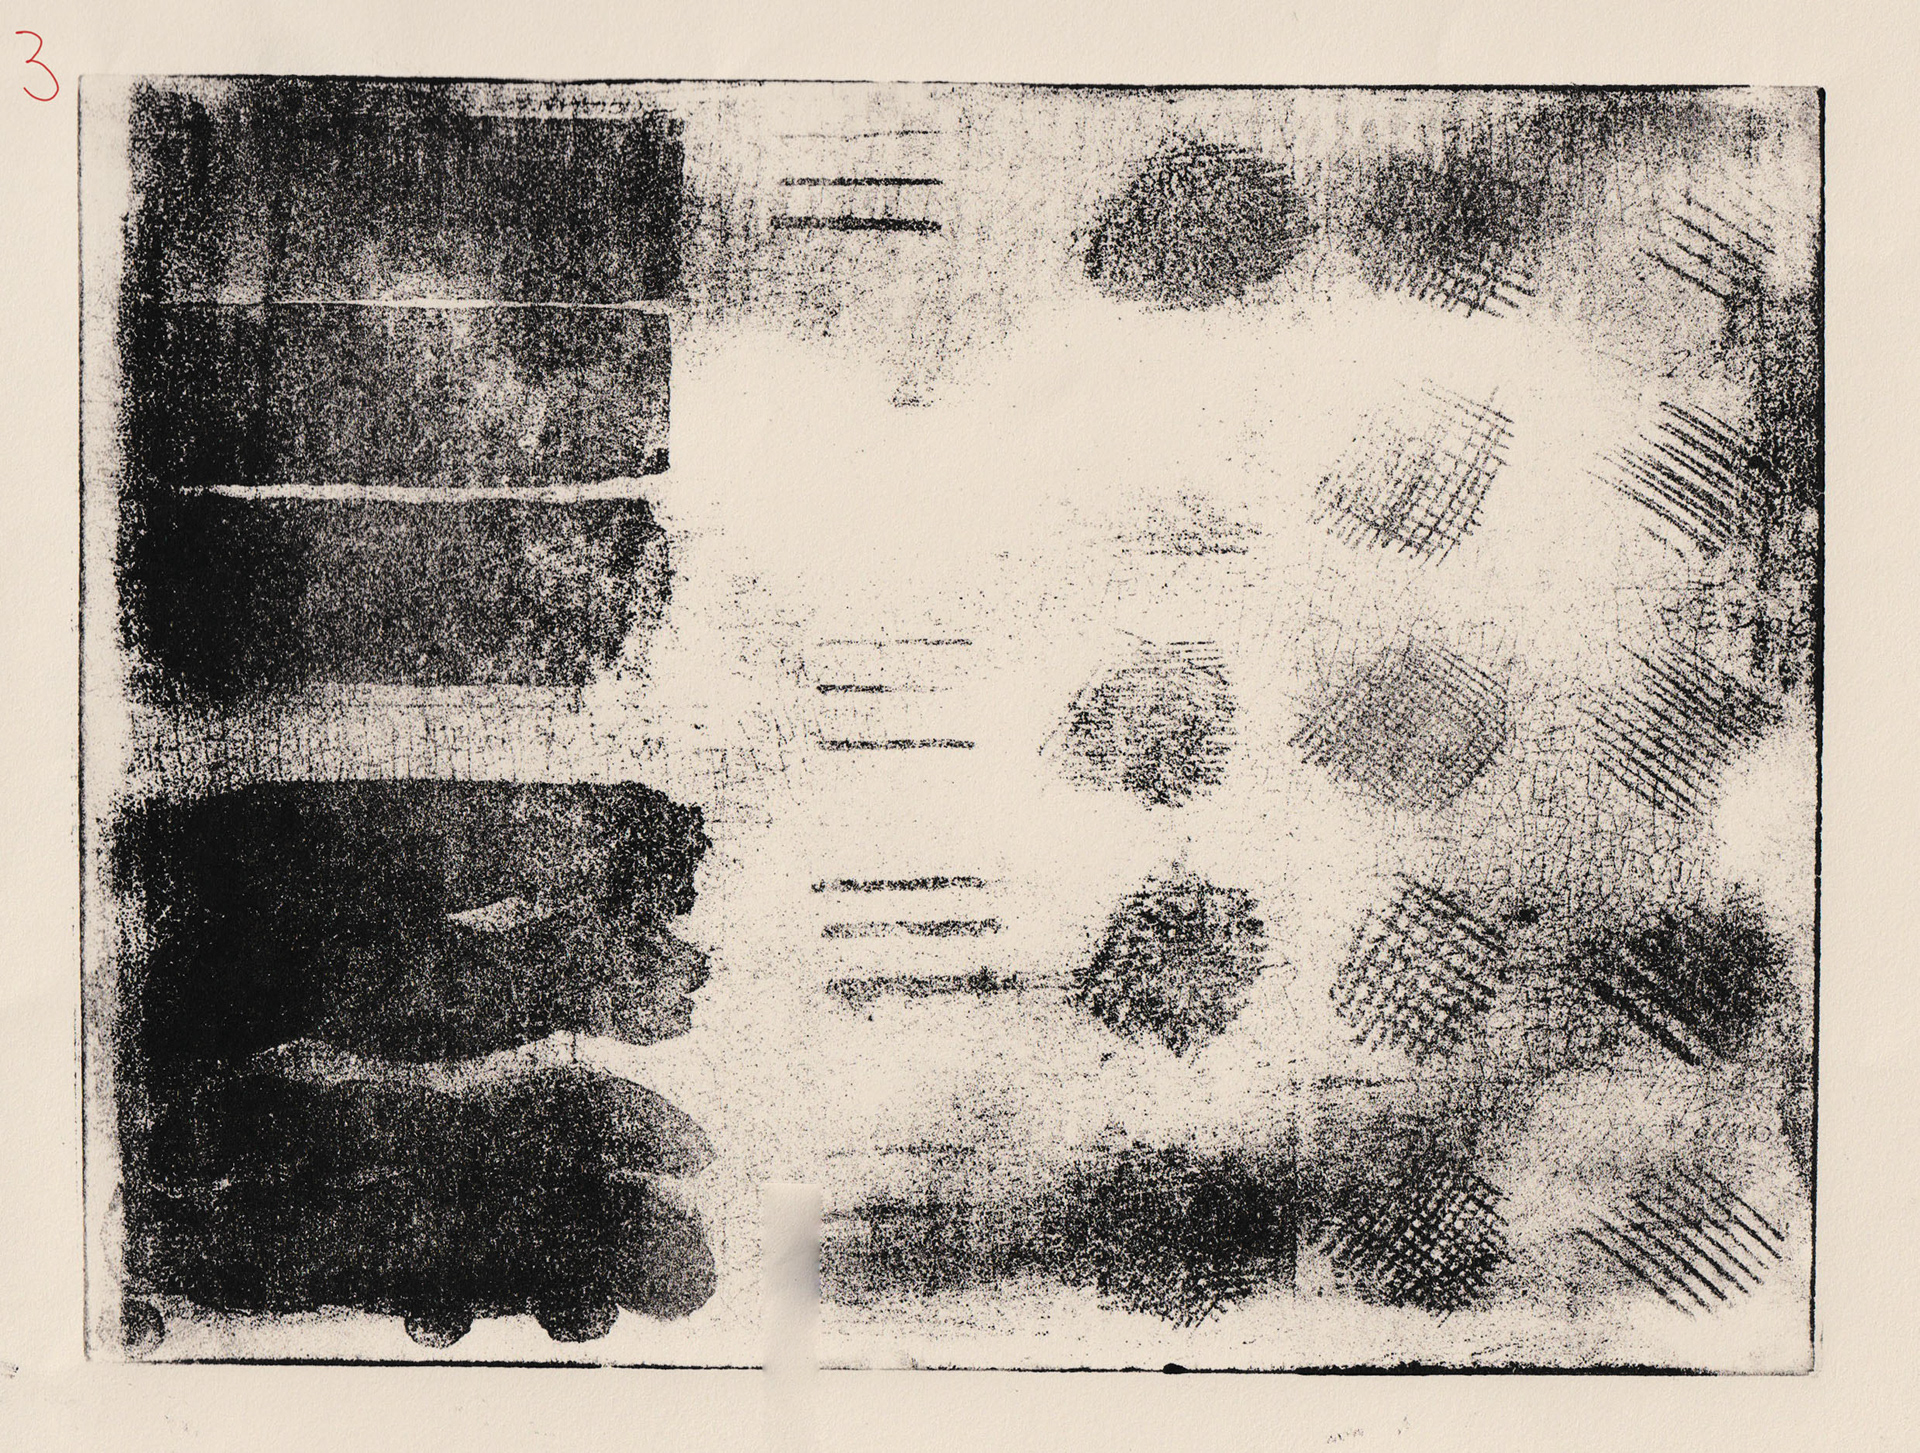
To “close” the plate I added talc and gummed the plate without buffing it in. When I came to print a second time, I washed the gum off under the tap as I had done the first time. Doing it this way brought back any areas that did not print the first time.
After the second run I dusted with talc and gummed the lino but this time buffing it in with cheese cloth. Then I washed out the plate with Sansador and removed with a wet rag and sponge immediately inking up the plate while still damp. Here, I was treating the lino plate as I would a stone. However, the areas that had printed before now disappeared again, but the plate was a lot cleaner.
Lo – Shu lino lithography
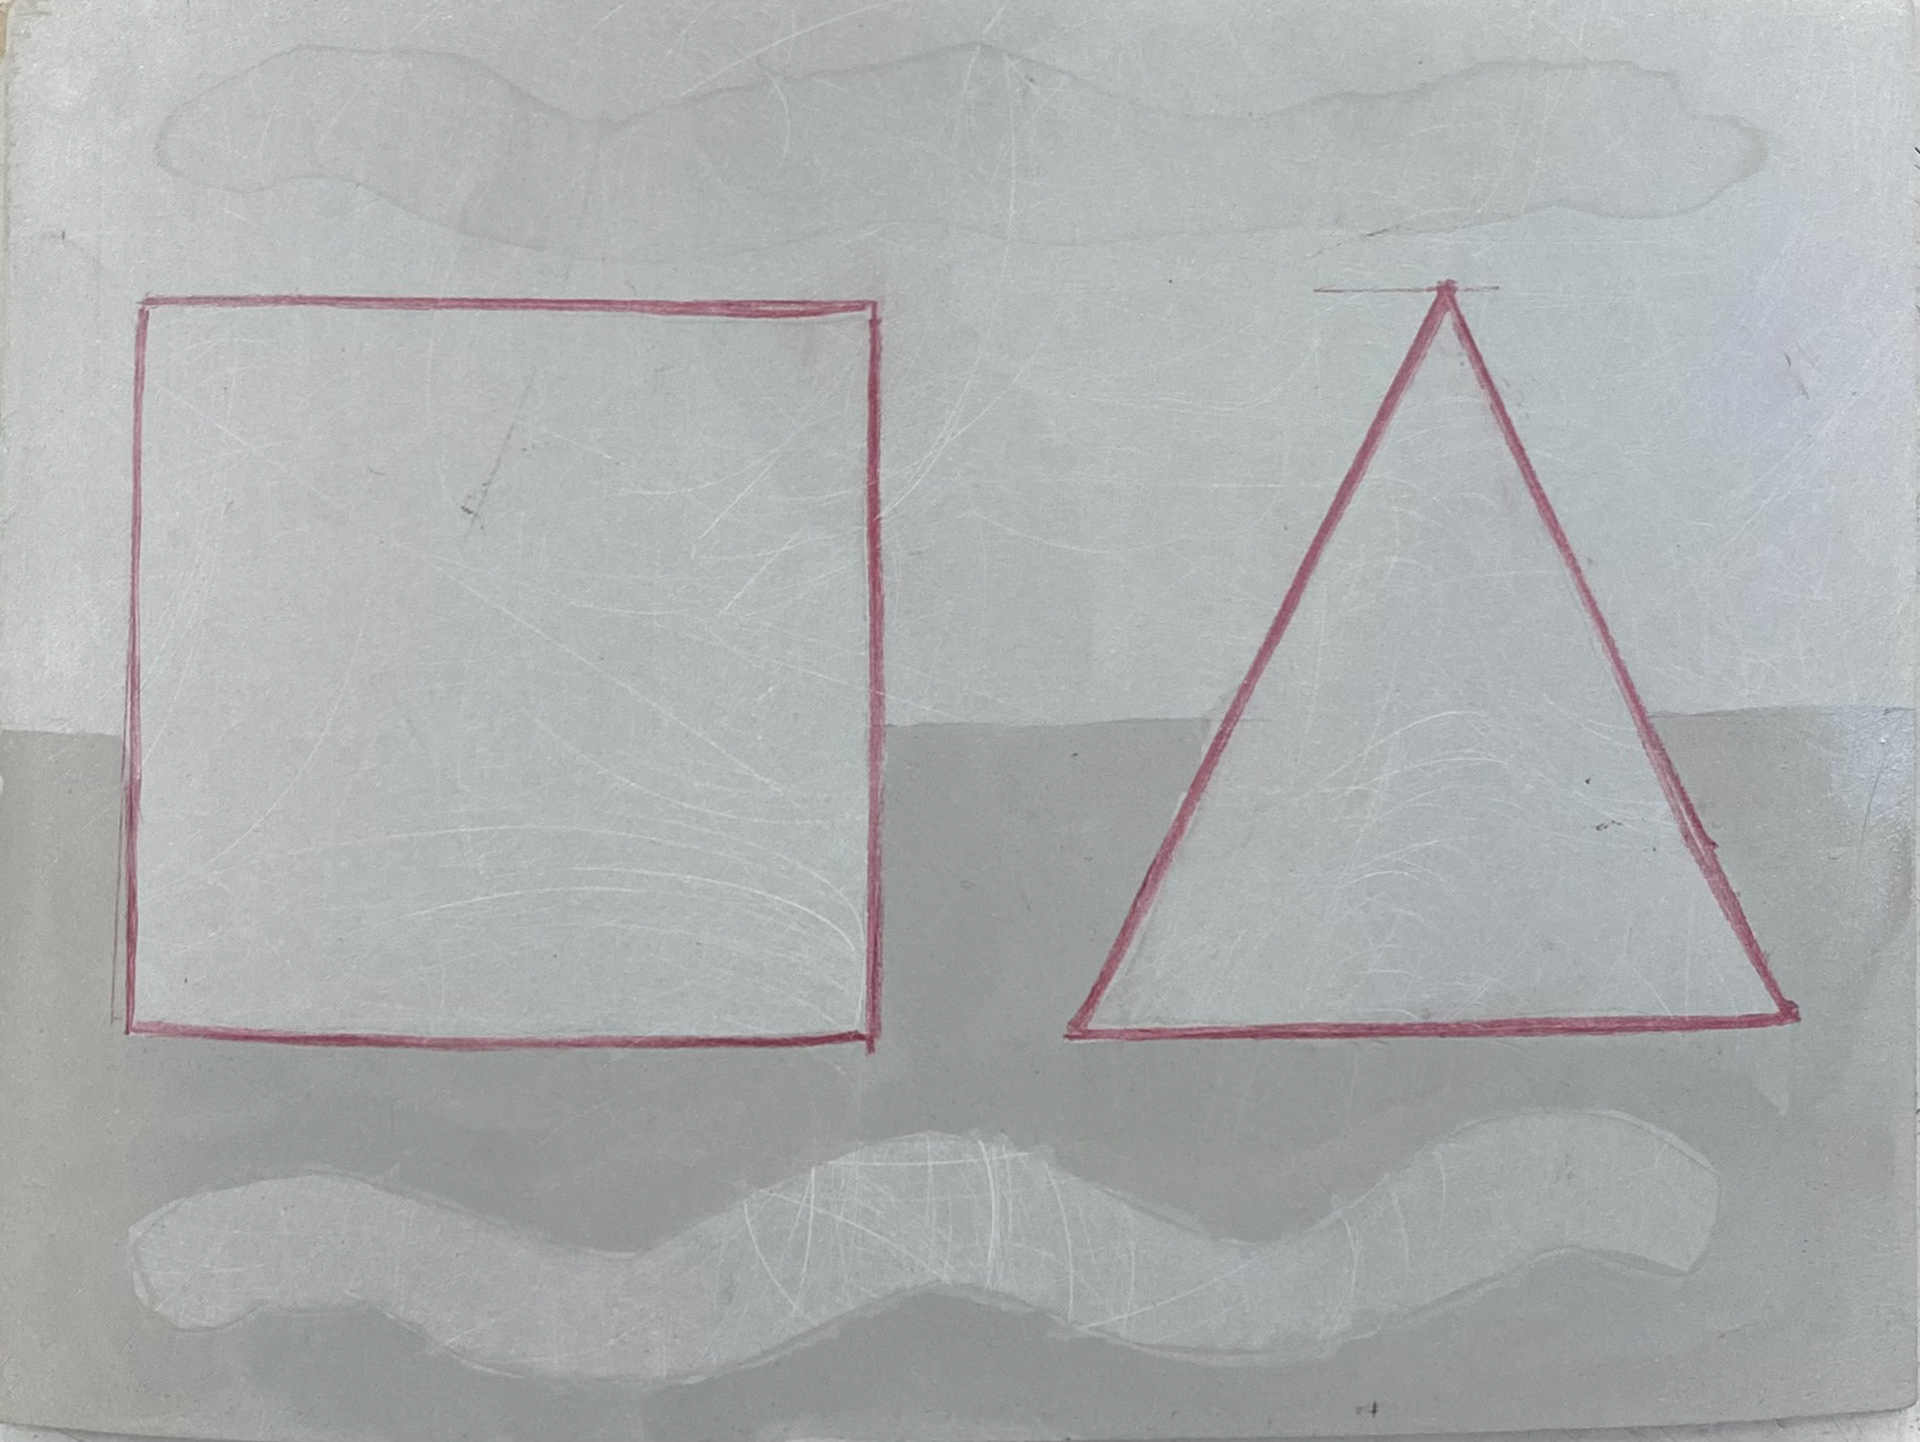
Also following Scarlett’s book, I had a second test plate where I tried a Lo Shu wash. The lino was prepped the same as the previous plate. The only difference was that I had this plate dry inside while the other dried outside. This meant the Lo Shu plate had a smooth background that hadn’t picked up any texture from crackled gum. For the wash I used a ratio of 2 drops gum Arabic to 40ml of warm water as this is what worked best when experimenting with Lo Shu washes on stone. This was applied to the lino and left to air dry. When dry, I painted gum on half the plate around the lo Shu shapes. This was to see the difference between an inked and plain background against the washes.
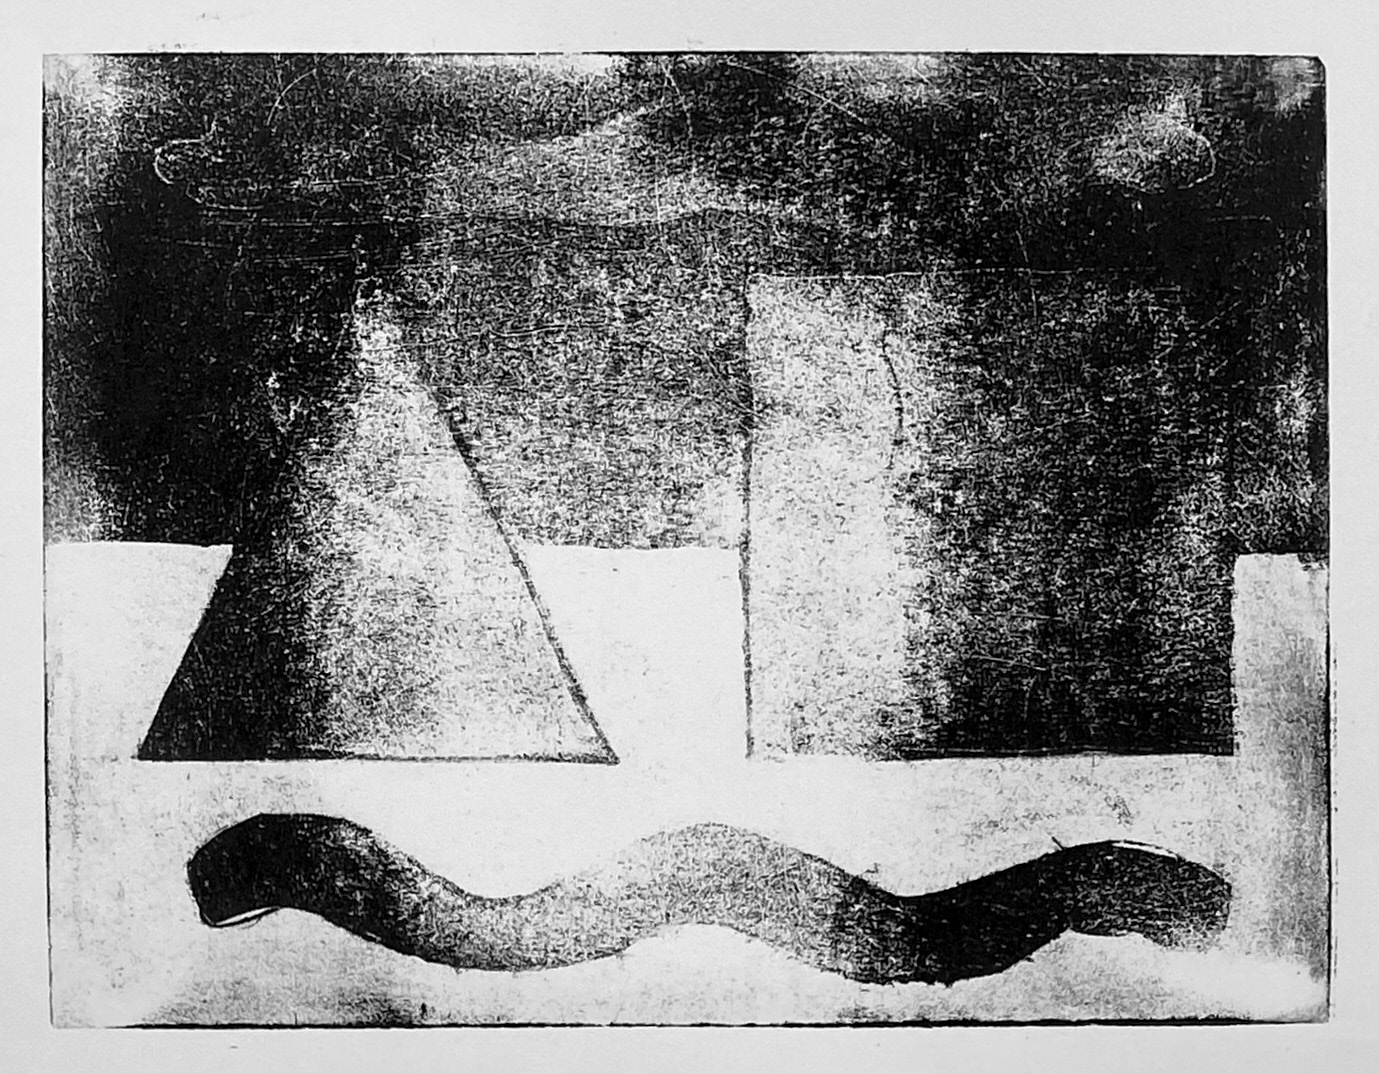
Again, when printing, the image darkens quickly. There was a clear tonal variation that appeared however the reticulations are not as detailed as they would be on stone.
Would I try lino lithography again? Yes! I think it is a brilliantly unique process that produces distinctive textures. With any printing technique it gets better with more practice and could be a whole area of exploration within itself. It is an affordable and accessible alternative to stone lithography and is an innovative way to introduce the principles of lithography. I am curious about the possible applications of lino lithography. Could other lithography techniques such as water colour resist and others be used on lino? This is something to revisit.
Also, I must say how effective Alternative Lithography by Scarlett Rebecca was in learning this new process. Complete with step-by-step photographs and troubleshooting notes, it is an immensely helpful tool for any printmaker.
Polyester Plate lithography
Polyester plate lithography uses a thin sheet of polyester as an alternative to stone. What sets this apart from other processes is that the polyester plate does not have to be processed before printing. At its simplest, the printmaker can draw onto the plate straight out of the packet and begin inking up and printing immediately after. This makes it one of the quickest and most immediate forms of lithography.
I brought a plate from Handprinted, but these are also available at Intaglio Printmaker. With one 33 x 50cm sheet I was able to make four test plates about A5 size. On the first test plate I used permanent marker, wax crayon, biro pen, oil pastel, stones lithography crayons, oil-based ink and a liquid ink pen. When drawing on the plate and printing, I followed the instructions on the Handprinted website. I printed the polyester plates using a spoon.
Some things to note:
-Sharpie and red ink had some bleed.
-All drawing materials apart from the liquid inks printed well
-Wet underside of plate to prevent it curling up with the roller
-Biro produces the sharpest and finest lines
-Drawing/ image should be kept well within the plate to avoid ink build up on the edges
One of my biggest problems was scumming. To test how comparable the plate is to stone I closed it with talc and gum then cleaned off the marks with Sansador then water. This removed most of the drawing materials completely leaving only permanent marker and biro. This means with some drawing materials the plate could be reused or parts of the images reworked. After removing the drawing materials, I drew on the same plate with a sharpie and this printed fine. The plate can also be drawn and printed on both sides.
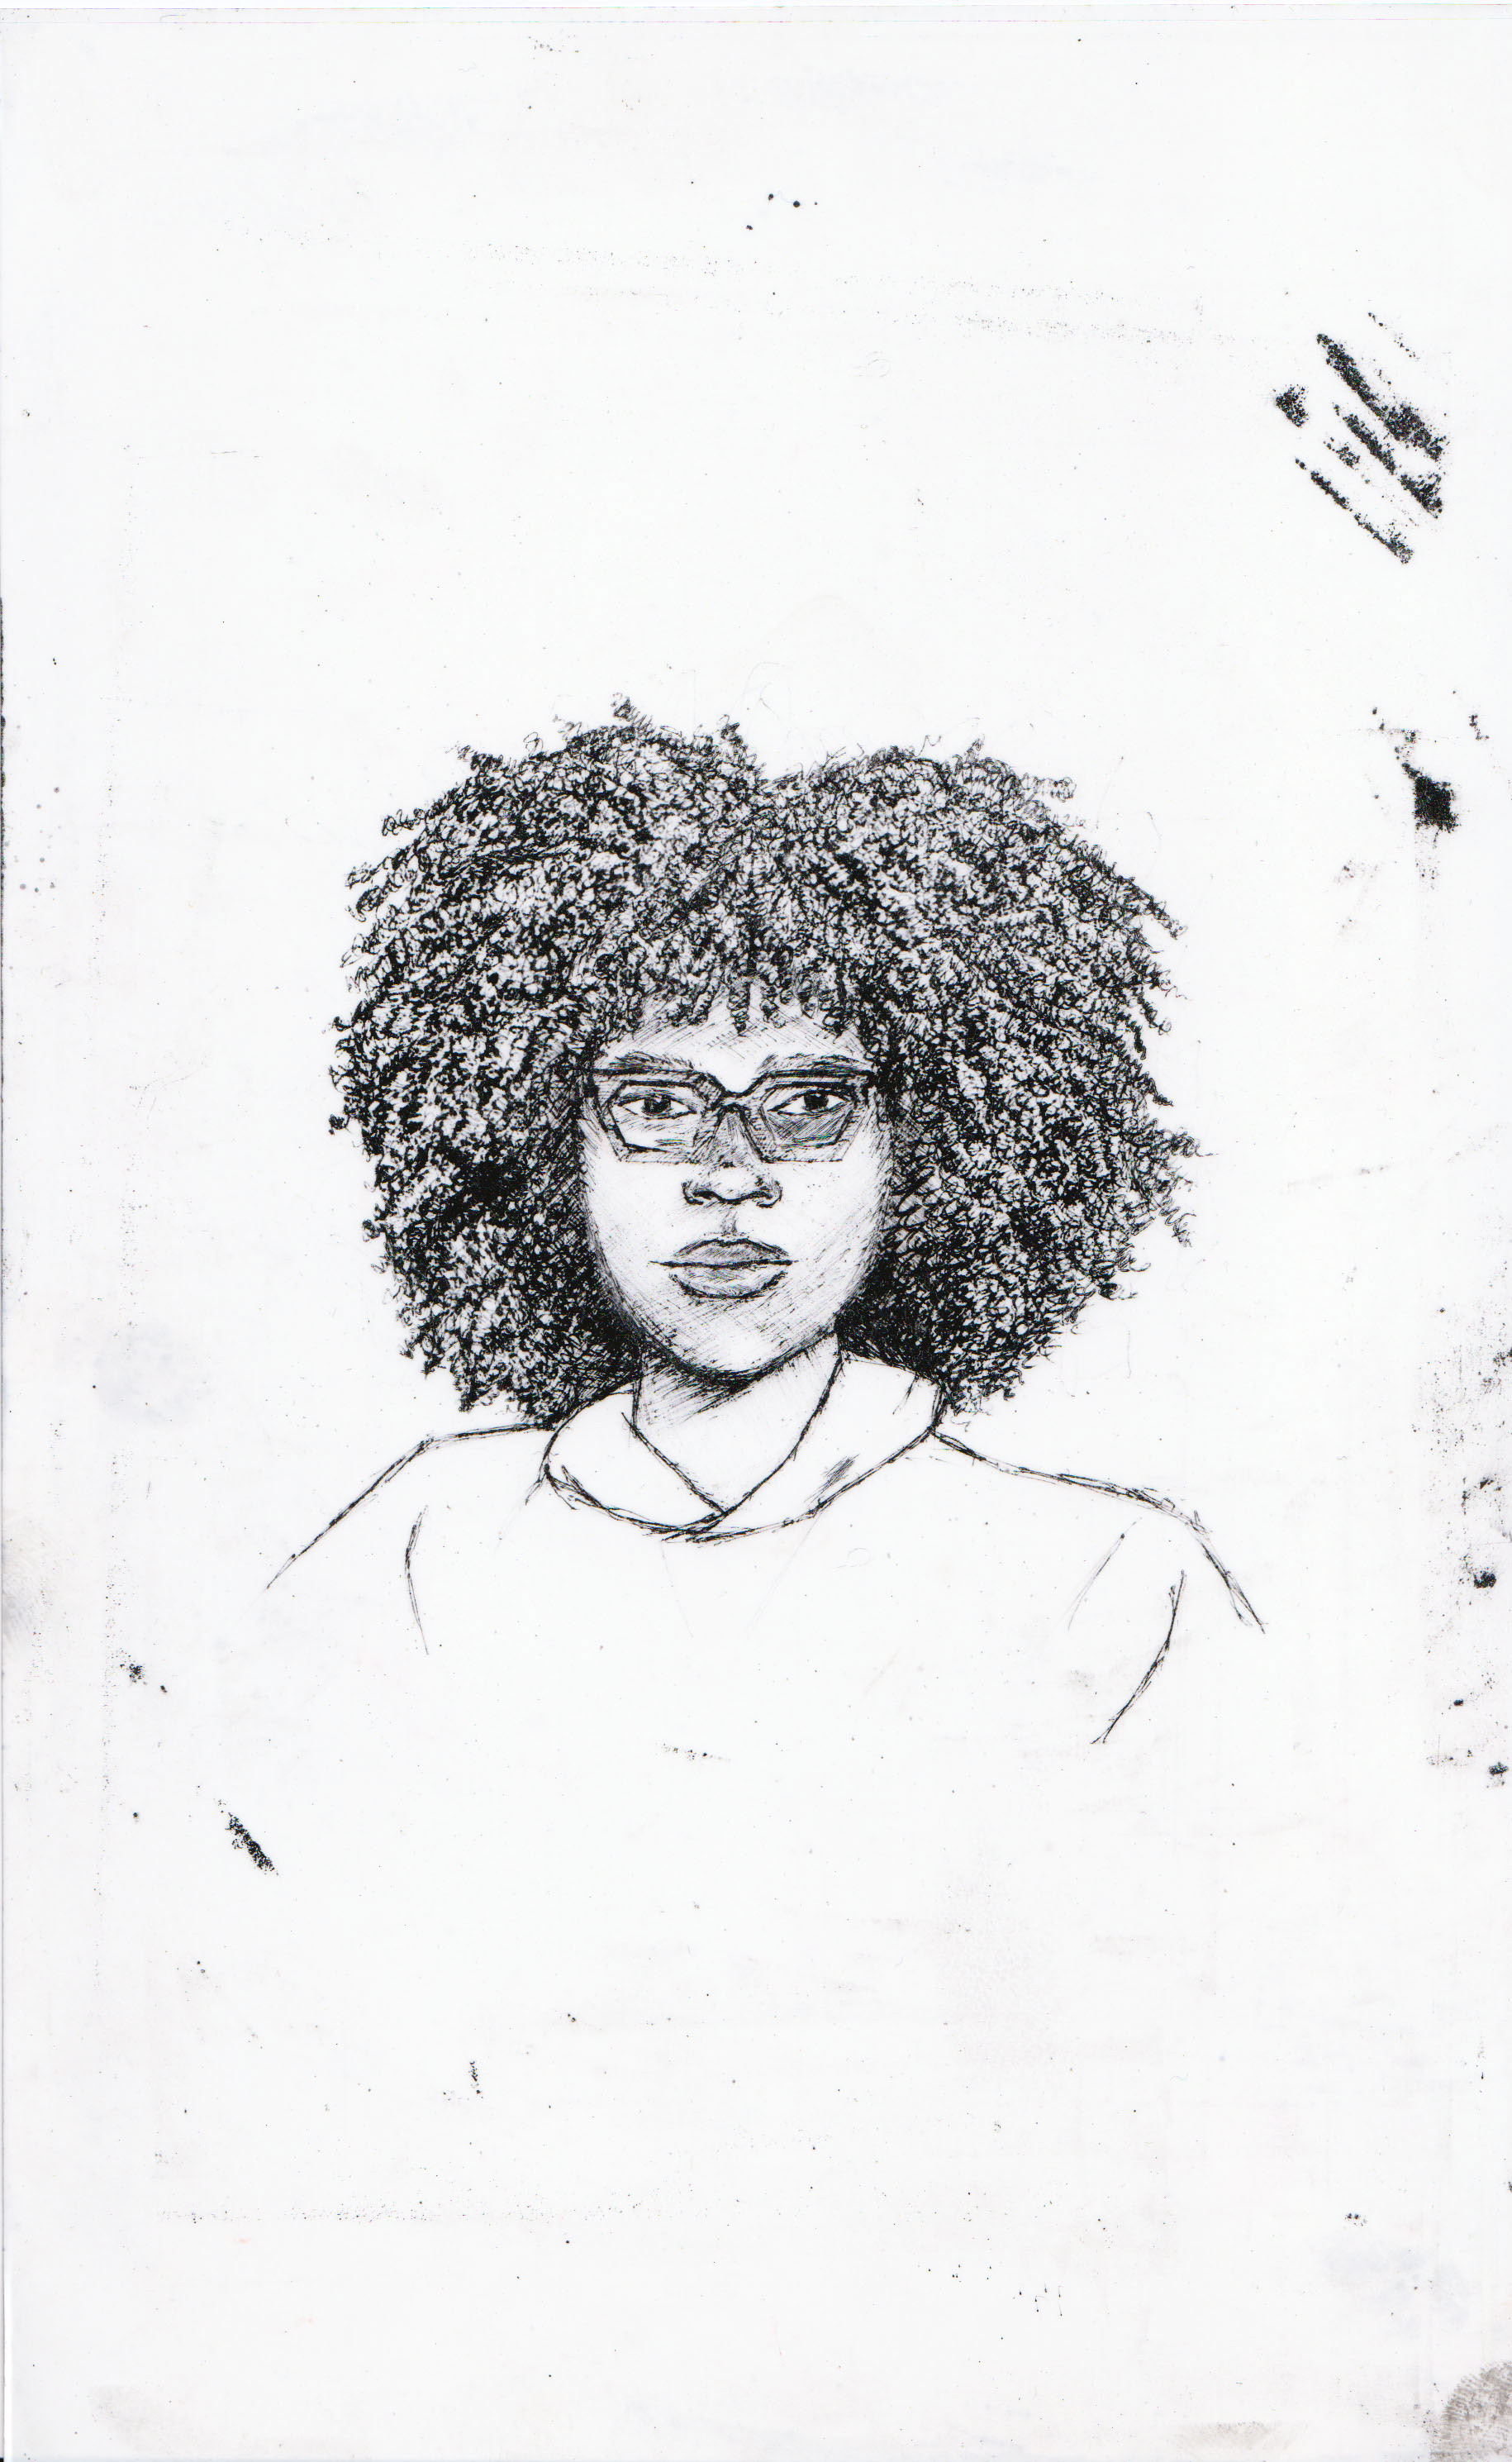
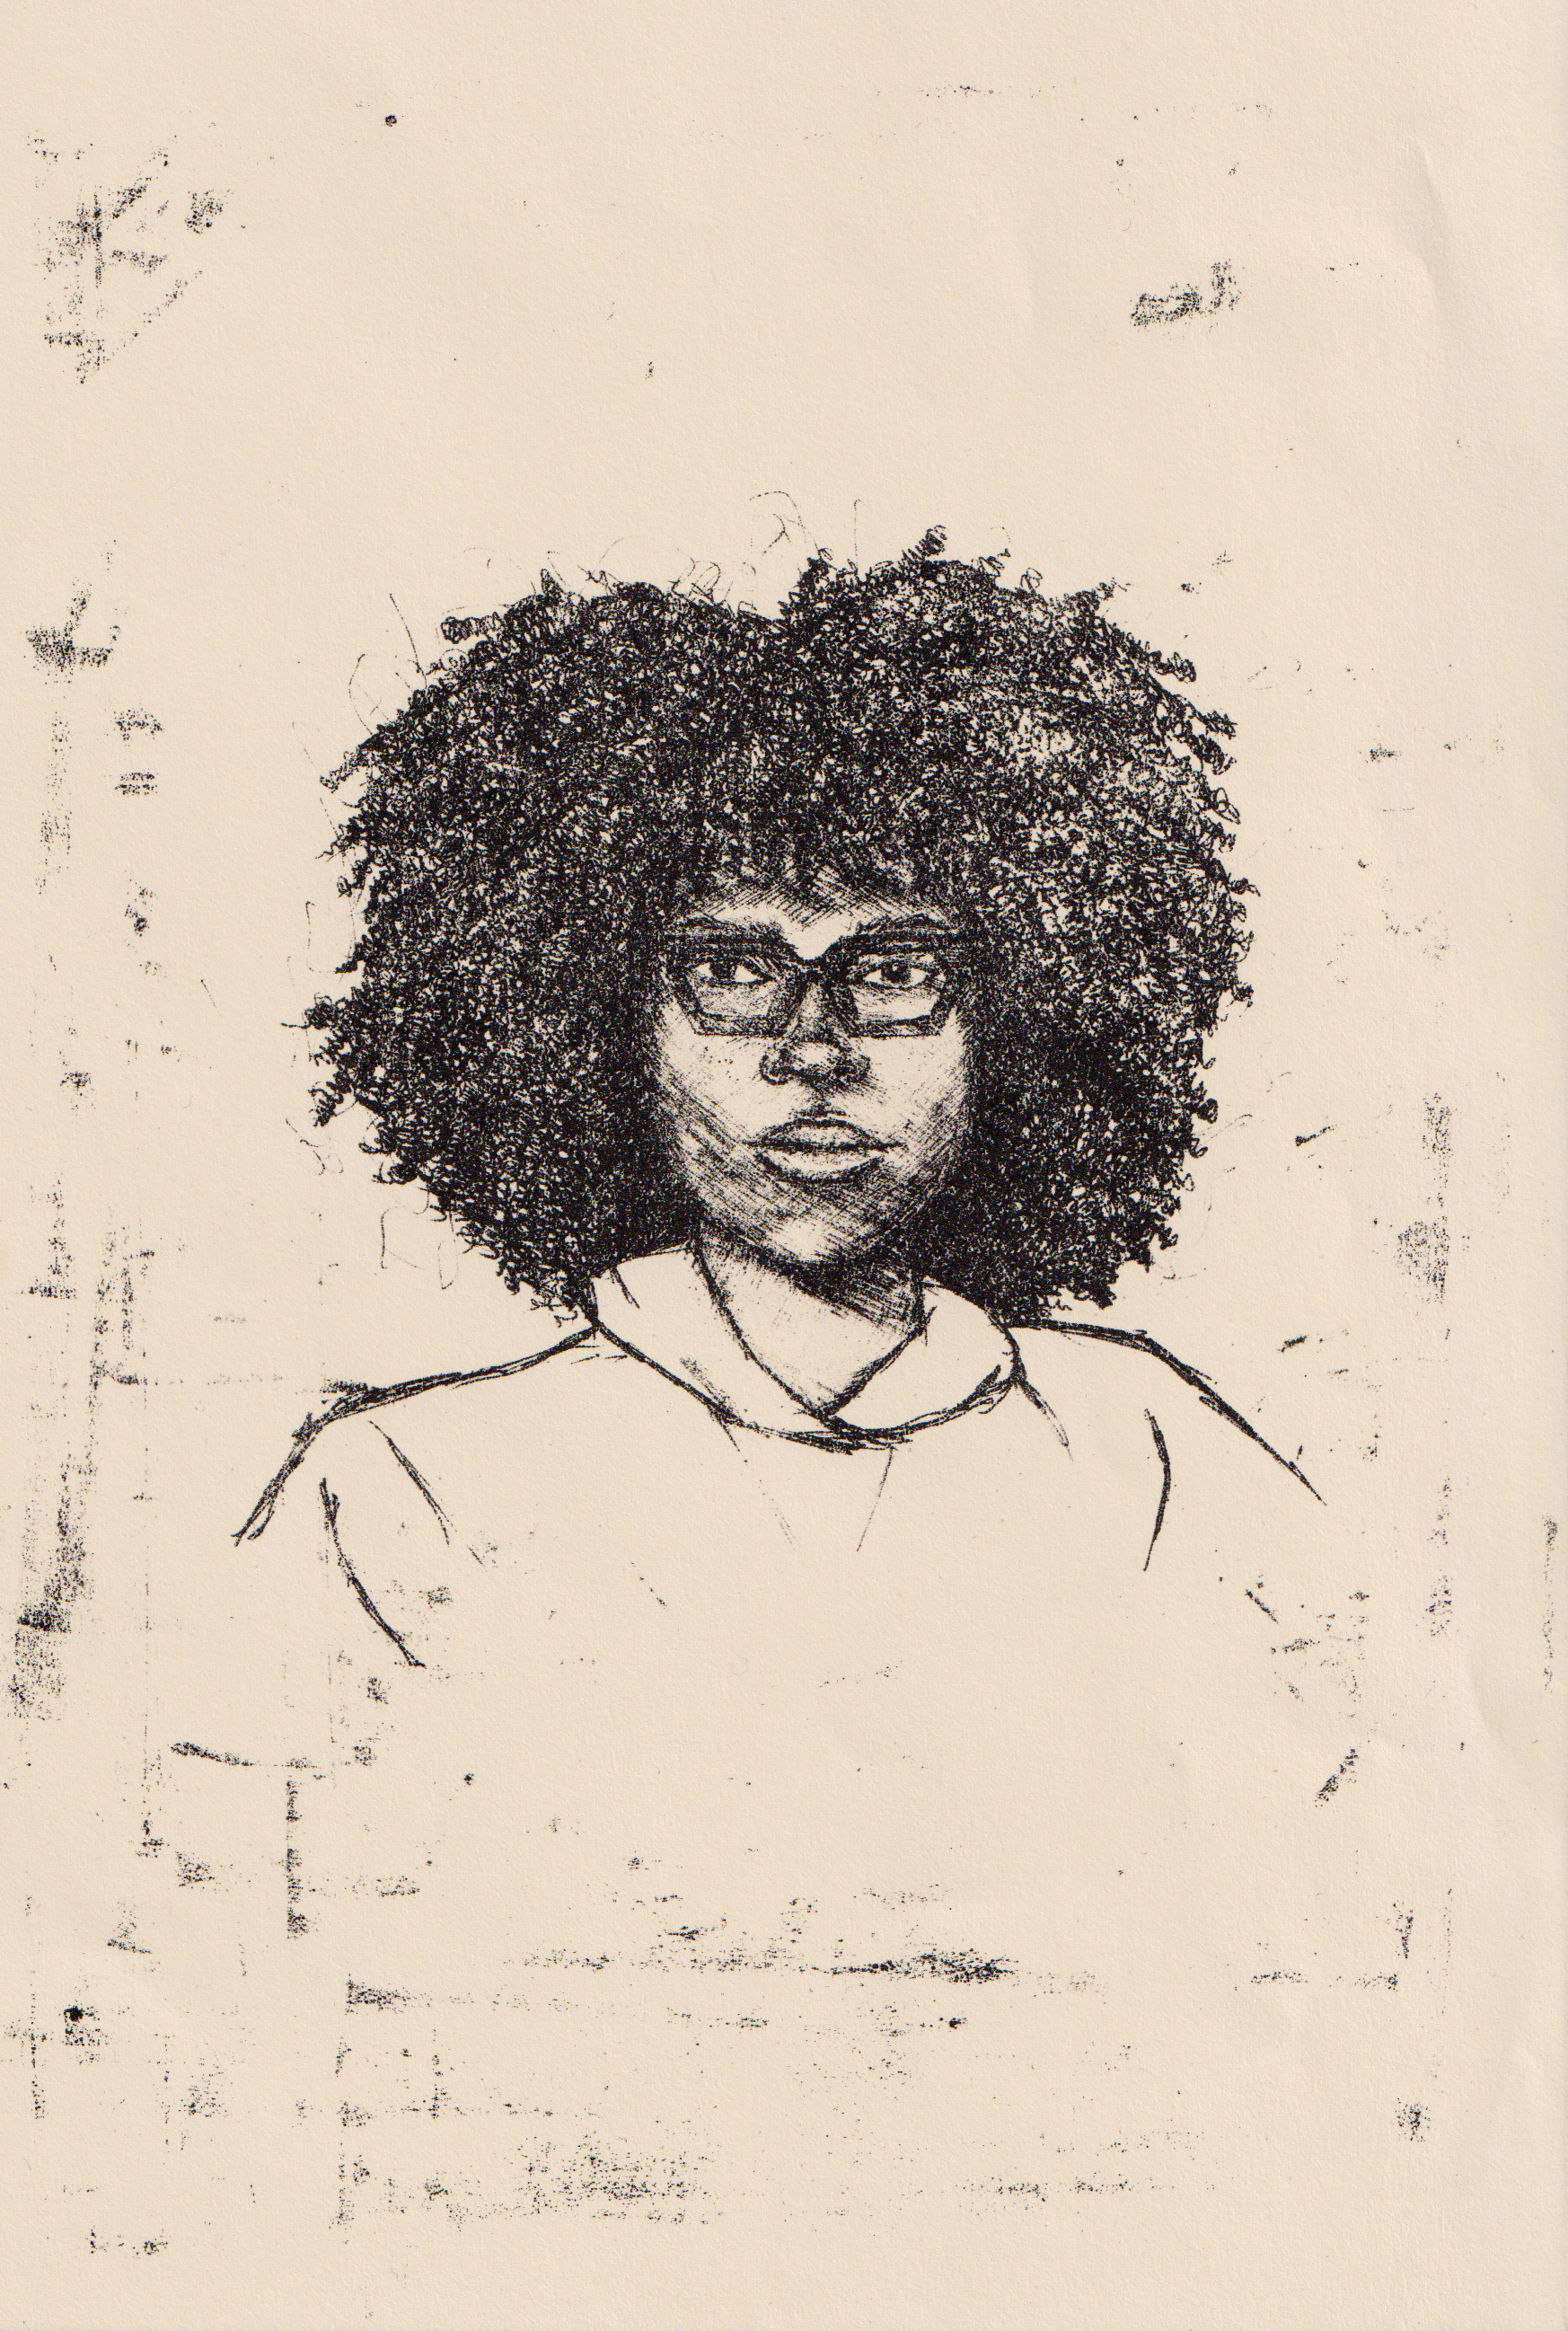
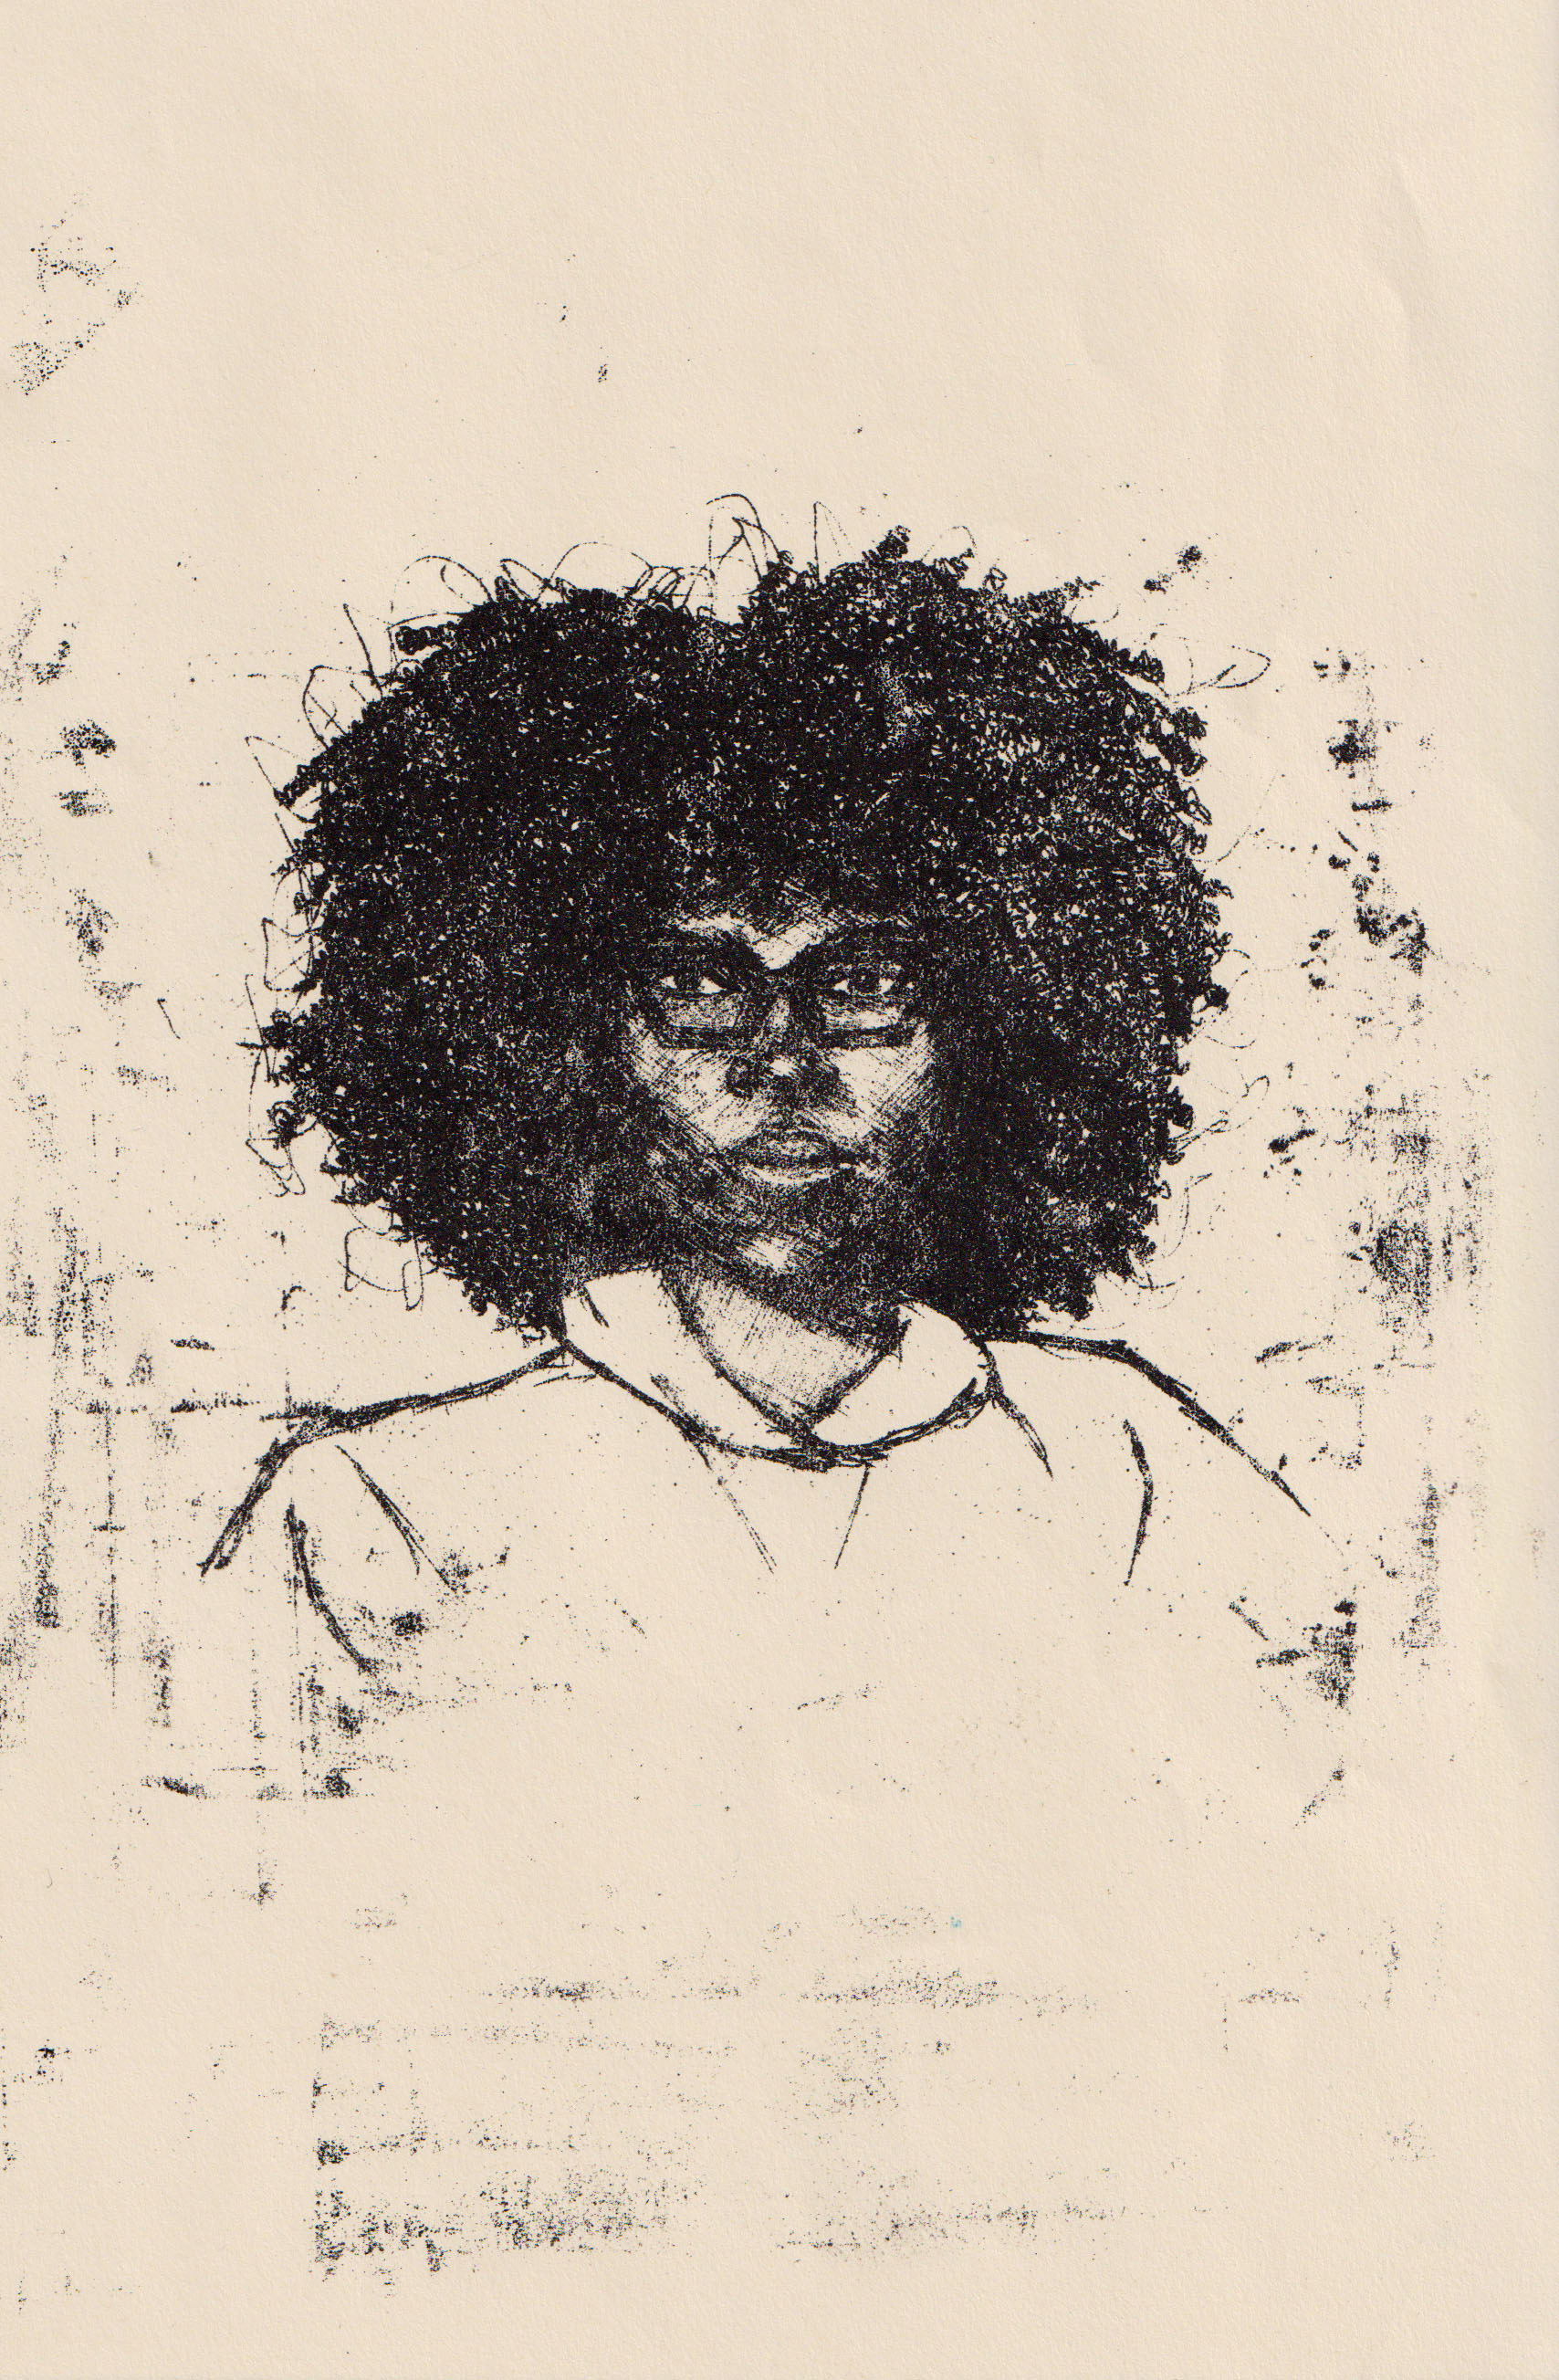
As another test, I sketched a self-portrait using a biro. I was able to achieve some tonal variation and the image printed pretty much as it appears on the plate. You can see the scumming here. I printed with a spoon which, while simple, meant there wasn't the exact same pressure for each print. It was difficult to get a balance between the amount of ink needed and pressure. But I was happy with the range of prints I was able to produce none the less.

Is it really no stone no problem?
Well, as I detailed throughout this entry, I came across a few problems, but many can be solved through practice and a few easy adjustments. These methods are more convenient, affordable and accessible than stone lithography. Alternative processes aren’t as laborious as stone lithography. There is a shorter processing time or printing can be done immediately meaning you could produce more prints in a shorter amount of time. However, with lino litho you would struggle to print a large edition of identical prints anyway. Another drawback is the inability to rework the image. What you draw is what you get. With stone you can rework the image by counter etching the stone, deletions, and using an acid etch whereas these are not options in alternative methods. Polyester plate is more forgiving than lino litho.
I think these methods used in conjunction with stone and photo lithography would have promising results. For instance, the crackling pattern that the gum makes on the lino could be printed onto film and exposed onto a photo plate to create a textured background for a multi plate/ stone print. The polyester plate can be put into a laser printer and hold an image that can then be inked and printed by hand. This is a convenient way to introduce photographic images in lithography.
I am far from done with my exploration of these techniques. I would encourage those who are curious of experimental techniques or looking for ways to do lithography at home to have a go!
A glossary of some of the words mentioned in this post can be found here.
For more casual frequent updates you can find my Instagram @samantha_m.t
Any printmakers, artists or enthusiasts that wish to get in contact with me, my email is smt.thompson@outlook.com
Happy printing,
Samantha
Published 05/10/2025